Showing posts with label Liquid Pearls. Show all posts

Wednesday, March 5, 2014

PKS Sketch Challenge

Happy Wednesday!
 
It's finally warming up here in the Frozen Tundra....Yippee!!!!   
I can FINALLY get the kids outside for some fresh air, more than just from the house to the car and back. 
 
And I've start Spring cleaning....here in Wisconsin (or at least in my neck of it), spiders are a common nuisance.  So before the thaw, I am sweeping all the ceilings and nooks/crannies to keep the pest population down to a minimum. 
 
In between the cleaning and feeding the kiddos, I created a card for the current Peachy Keen Stamps challenge.
 
It's a sketch challenge.......
 
http://www.peachykeenstamps.com/forums/topic/peachy-keen-challenge-14-03-sketch-challenge/
 
I am SO ready to Spring and all the festivities and family traditions..i.e. Spring cleaning.  


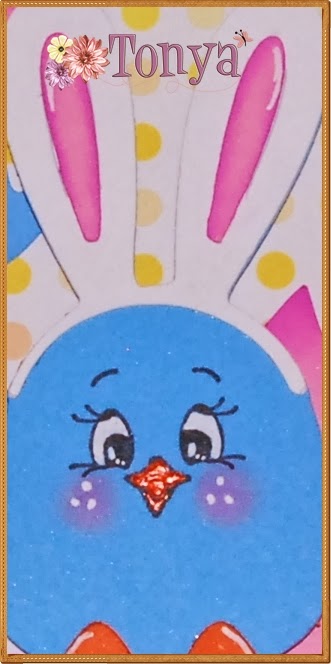
For my card, I pulled out the 3 Birds on Parade Cricut cartridge (one of my FAVS!) and cut the bunny bird at 3 1/2 inches.  I only cut the base so that I could stamp a Peachy face on him. 

 
I stamped his face in Memento Tuxedo Black ink, highlighted with a Gelly Roller, colored his beak with Pumpkin Liquid pears for dimension and interest.   Finally chalked and highlighted his cheeks.
 
The cracked egg is part of the bunny bird cut.  I stacked several on the side, in different sizes, on the left side.  I'm thinking that I should have added some yellow eggs, but hindsight is 20/20, right? 


Saturday, February 15, 2014

Just a Note.....

Happy Saturday!
 
Are you as ready for Spring as I am?  This winter just seems to never end!
 
In the midst of my hermit living this season, I created this lovely card.


The parts of the bear (body, face-2, & bow) were cut out of Xpress Cardstock using the complimentary SVG, then colored with Copics.  The dress was stamped (and hand cut) out of the same paper as the card accents. 
 
 
I highlighted her with a clear Spica pen and a white gel pen. 
 
For dimension, I popped the top face and bow on foam squares. 


The frames (for the bear and inside sentiment) is a Samantha Walker Silhouette File (#14232)
The white ovals were cut from white Core'dinations cardstock.  The mauve toned frame was cut from pink cardstock in my stash.  The color of the cardstock was too bright for the feel of the card as a whole.  So I toned it down with Victorian Velvet Distress Ink.  A perfect match!  Some liquid pearls for the finishing touch.   


Monday, December 23, 2013

My Present

Merry Christmas!
 
Today is my post over at Get Inky!  Our theme is Winter Snow!
 
First thing I thought of, living in the Midwest, is SNOWMEN!  I love snowmen.  Our home probably has more snowmen out for decoration than Santa or Nutcrackers.  And if you know me at all, it is very difficult to have more of anything than Nutcrackers.  :-) 


There is a story behind this tag.  :-)   When the challenge came up, I wasn't sure what to create.  Of course it had to have a snowman..but in what way....

So....I thought I could create a tag.  I love making tags for my family's Christmas presents...they are cute, personal, and the kids LOVE that I do that.  But this tag is different, it's for MY present.  My husband and I have been married for long enough that unless you go and buy something big, such as a recliner or new windows, you can't really surprise the other person.  So this year, I thought about what I would like to have....and ordered it (after I looked around for the best deal...and where I could get add-ons cheaper than if I ordered any separate, and told my husband what I was doing).   The package came and it's quite heavy (it's a crafty machine, of course).  Since my husband just had surgery for biopsies (yes, multiple), he was unable to lift the box to wrap.  That means I wrapped it.  I thought it needed something... But of course, a tag!!  The ideas was rooted....and perfect for this challenge. 

And since the wrapping paper I chose had red, gold, and green...it fit the current Peachy Keen Stamps photo challenge too.
 
 
http://www.peachykeenstamps.com/forums/topic/peachy-keen-challenge-13-50-photo-inspiration/

With that in mind, I headed to my craft room - the dining table.

To create the base of the tag, I used Scraptastical Kreations' Element Me This file and green cardstock.  The edges were inked with Evergreen Bough Distress Ink.
 
I used Versamark ink and the GI 2013 Holiday Stamp set.  The mask technique was used to create the tree line.  For the ground, I tore a piece of paper and traced with an embossing pen. 
 
 
I used a white gel pen and a Spica glitter pen to accent the trees and give them a bit of dimension.
 
 
I stamped the holly leaves and berries (from the stamp set) on the top half in Versamark ink and highlighted with a Spica Glitter Pen.
 
 
The buttons on the snowman were created with the 'reindeer nose' from the stamp set.  I colored them with an Evergreen Bough Distress Marker and added the 'holes' with a white gel pen. 
 
 
The snowman was created with a file I purchased in the Sil store and cut with my Cameo.  The cute face is a stamp from PK 520 Stamp Set - Winter Face Assortment by Peachy Keen Stamps.  I stamped it in Versamark and heat embossed with Zing embossing powder in black.  His nose was 'colored' with Pumpkin Liquid Pearls.  His pipe was finished using Hot Cocoa Liquid Pearls.  A bit of blush (dry chalk) to his cheeks too.  For the final touch, I added some Frosted Lace Stickles to his hat.   


The ribbon is from my stash (Hobby Lobby purchase).  It has the perfect color combo for this (red & green with gold strands). 
 
 
I think it turned out great.  Looks wonderful on my package.  :-)
 
 
Merry Christmas to all of you from all of us.


Saturday, December 7, 2013

All that Stickles Linky Party

Happy Saturday!
 

It's time for a new linky party at All that Stickles
 
Our party theme is Happy Holidays - Create any winter holiday project, using Stickles.
 
 
I created a card using a Samantha Walker Silhouette File, available here.
 
I just love this card.  It is must 'prettier' in person than the pictures show. 
 
For the globe 'glass,' I used the packaging from a Peachy Keen Stamp set. It worked perfect!
 
 
For the snow, I used Rock Candy Stickles.  While it was still wet, I added some Stardust Stickles for sparkle.
 
I added Holly Stickles to the that trim.  Stardust Stickles were add to the background after inking with blue fluid chalk.  Golden Rod Stickles were put on the knob of the globe. 

 
The file has layers and a face/button already in the snowman.  But I released the path and removed the eyes, nose, mouth, and buttons, so I could stamp them instead.  I used a Peachy Keen Stamps face from the November SOTM set for face, and another face stamp from the July SOTM set for the buttons.  I only inked one eye to use.  To give a bit of interest to the face, I colored the carrot nose with Pumpkin Liquid Pearls with the tip of a straight pin.  :-)  The inside sentiment is also a Peachy Keen Stamp