Sunday, March 30, 2014

Royal Color Challenge

It's time for a new challenge over at the Scrapbooking Queen's Challenge blog.
 
 
Our challenge was to use this image......


Here's what I created.............
 
Isn't it the cutest??


The inspiration for my card was the current color challenge at Peachy Keen stamps.
 
http://www.peachykeenstamps.com/forums/topic/peachy-keen-challenge-14-04-photocolor-inspiration/
 
What caught my attention were the blue eggs in the umbrella.  And, of course, Easter came to mind.
 
I pulled the image into my Silhouette software to size it in relation to my card pieces (see what files I used below).  The pony was colored in with Copic markers.  
 
The sentiment is from the March 2013 Peachy Keen Stamps SOTM set
 
 I used Samantha Walker's Bendy Card w/Fence (card base), Easter Bunny Banner (grass), Card Rainbow (clouds/rainbow), 4 Starbursts (sun), & Basket Weave Card (Easter eggs) Silhouette Files to create all the pieces of my card.   
 
 
The Queen's Challenge runs through the 29th of April.   


Sunday, March 23, 2014

Pop-up Flower Tutorial by Tonya

For Red Carpet Studio Challenge, Click HERE
------------------------------------------------------------

Tonya here with my first Guest Designer post for Samantha Walker Designs.  
 
I am excited to share my ideas & projects with you.   
 
While looking at other crafter's blogs, I came across a flower pop up card, and thought to myself - 'I would love to be able to make that!'  As I scrolled through the post, I saw the picture of a lily version.  Lilies remind me of my parents.  Lilies are my mother's favorite flower; and my daddy used to send Easter Lilies to me and my sisters every Spring, before his passing in '98.  I knew I wanted to try my hand at a lily version, of my own. 
 
The instructions in the post show how to cut an 8 petal flower with a die cut machine (she provides a free file), then hand cut to make a 7 petal flower.  Her file provides a rounded petal flower...and I wanted a lily like flower.  I figured I could create a file with my Silhouette software to fit what I wanted.  
 
With that in mind, I headed to the Silhouette Store to look through Samantha's files.  I did not find a flower file that perfectly suited my needs.  So I thought I could adapt/create one. 
 
 Samantha's Lattice Flower Circle file (#23491)  worked nicely as a starting point. 
 
I created an internal offset for the flower outline.  To do this, I highlighted the image and clicked on the offset icon (upper right).  I put the offset distance as 0.150.  This created a more pointed flower petal (closer to a lily petal) and moved the offset away from the image so that it was easier for me to drag it away from the base cut file. 
   
 Next, I moved the offset away from the base file, and deleted the original image. 
  
For the flower, I needed 7 petals, and this one had 8.  I used the knife tool to cut away one petal.  I lined up my curser so that the crossbars were centered between the top and side petals to find the midpoint of the flower, and 'cut' from the center out.

 Next, I created score lines between the petals for folding.  I used the same method as the knife tool above, drawing dashed lines from the center out between each petal.    
 
To keep the pieces together, I highlighted all the parts and grouped them. 
 
Since these were to be lilies, I needed some stamens.  I used a stamen (top) from Samantha's Hawaiian Hisbiscus Flowers (#4170).  
 
All I needed to do was duplicate the flowers to the number needed for the card (7 total), and size the stamens accordingly. 
 
*Note* - there are 14 stamens in my file, instead of 7.  This is just in case a couple do not cut cleanly or I make a mistake/rip one while embellishing the stamens.  
The stamens are not yellow in the original file.  I tend to 'color' my pieces so when I cut them out, I have a visual reference. 
 
Here are my flowers - one assembled (center) and 6 unfinished.  The flowers were dry embossed for detail.  I cut the stamens out of the same white cardstock as the flowers.  They were colored with a Wild Honey Distress Marker mixed with water and highlighted with yellow Stickles


RCS Beaches Challenge

Welcome to another challenge at Red Carpet Studio!


This bi-weekly challenge is inspired by the movie "Beaches"


This movie centers around two women from opposite backgrounds who become lifelong friends during summers spent at an Atlantic City beach resort.

THE CHALLENGE:  In honor of Spring having sprung, vacations being planned, & relaxing times on the horizon, create a project inspired by a beach.  Do you have vacation pictures that need scrapped?  Are you partial to beach colors?  We can't see how you are inspired!

Challenge Guidelines
Project must be posted during the duration of the challenge, no back linking.
Project must fit the theme of the challenge.
Link up by April 5 at 11:00 PM US CST.
Number of challenge entries is limited to three per participant.

This challenge's sponsor is....

Charity Lazore for 31 Gifts


One of our participants will be randomly selected to win this beach inspired gift from thirty-one!
 
 
Here's my creation................................... 
 
I created a coin purse (gift card holder).  My inspiration for this was beach (tropical) colors.  I love teals, pinks, and yellows. 
 
I used a Samantha Walker Silhouette file (you can find it HERE).
 
The paper is from Samantha Walker Summer Cool paper collection.  This paper is double sided, heavy weight, and perfect for this project. 
 
(I thought this would be a cute little holder for an iTunes card.)
 
I inked all the teal patterns with Peacock Feathers Distress Ink.  To add some dimension, I used my McGill Tool Set to shaped the flowers, then spritzed the petals with Perfect Pearls Mist.  The flower was adhered together using glue dots. 


Wednesday, March 19, 2014

PKS March SOTM

Happy Wednesday!  
 
Tomorrow is the first day of Spring.   Can you feel it?  We can here in the Midwest.  It still may be snowing but at least the temperature are in the double digits.  Yes, Spring is here. 
 
Speaking of Spring, have you seen the new Peachy Keen Stamps March release?  SO cute!!!
 
Here's an adorable card I made using the set.......


Head on over to Peachy Keen Stamps and get your new set(s). 


Sunday, March 9, 2014

"The Lucky One"

 
This bi-weekly challenge is inspired by the movie "The Lucky One."


This movie is based on the Nicholas Sparks novel where a Marine returns to the USA after three tours of duty and goes on a search for the woman who he considered to be his lucky charm.

THE CHALLENGE:  Since St. Patrick's Day is right around the corner, create a project that featuring something that makes you feel lucky.  Maybe it's the green or the shamrock of St. Patrick's Day.  Maybe it's something in your life that makes you feel lucky.  

Challenge Guidelines:
Project must be posted during the duration of the challenge, no back linking.
Project must fit the theme of the challenge.
Link up by MARCH  22 at 11:00 PM US CST.
Number of challenge entries is limited to three per participant.


This challenge's sponsor is....


One of our participants will be randomly selected to win this awesome prize from this adorable digi stamp company!
 
Here's what I came up with for this challenge......
 
 
I created a cute little card for St. Patrick's Day.  We are Irish and I LOVE to celebrate with the family and give the kids a window into Irish Traditions. 
 
The cute leprechaun, lips (on the banner), and the inside sentiment are from Peachy Keen's Kiss Me Leprechaun Stamp Set.
The papers are from Core'dinations and Graphic 45's The 12 Days of Christmas 6x6 paper pad. 


Friday, March 7, 2014

21st Birthday Blog Hop

Welcome to Day 1 of Ashley's 21st Birthday Blog Hop!
 

We are so glad you could join us!
 
If you've come from the FABULOUS Ashley's blog, you're in the right place! If you have just come across the hop and would like to start at the beginning, please visit Ashley at Made Especially For You.

This weekend we are celebrating Ashley's 21st Birthday with some fun and creative, birthday/alcohol-themed projects! It's not 21 without a drink or two, right?!
 
........................................................................................................................
 
I am so HAPPY to be part of this hop.  I just LOVE Ashley to DEATH!!!  She is such a sweetie, and fun to talk to/be around, level headed, intelligent, with a great future ahead of her.  Geeh, do you get the idea that she is just F-A-B-U-LOUS???   She is!
 
When I was asked to a part of the hop, I was elated, and honored. Sparkly, pretty, and friendly comes to mind when I think of Ashley....And that was the inspiration for my creations.........
 
CARDS!
 
What is a birthday without cards???
 
My first card......
 
Isn't this little gnome a cutie?  I thought he was just adorable and since Ashley's birthday is in March, Spring and flower gardens are on everyone's mind.  And Ashley is a dear friend, so I thought a gnomie would be appropriate.    

 
I die cut some a balloons (to match the printed background paper) and numbers for my little gnome to hold just for Ashley. 
The inside says "Happy Birthday to my Gnomie!" 
 
 
My second card a bit more sophisticated.... 
 
Ashley LOVES polka dots and glitter.  This card SCREAMS Ashley, doesn't it?
 
I used a Teresa Collins paper pad that we went in on (halved the costs), and the colors and patterns were perfect.
I used a striped pattern from the pack for the card base, and polka dot mat. 


The cake stand was cut out 5 times (4 on white cardstock and 1 on patterned paper from the pad).  To coordinate the papers, I dry chalked the edges in yellow once all the layers were glued together.
 
The hearts and cake were spritzed with Perfect Pearl Mist.   

I cut out Happy Birthday from coordinating blue cardstock and spritzed with the same Perfect Pearls mist.   
 
 ........................................................................................................................
 
We have 21 fabulous sponsors providing 21 fabulous prizes for those who hop with us, and because there are so many of them, we have included all the prize information in the second stop of the lineup.
To be eligible to win, you must...
 
-Leave a comment on EVERY stop of BOTH days of the hop 
 
Winners will be randomly chosen and announced on Friday March 14th at 
Made Especially For You.

Your next stop is Nikki's blog.


Here's the complete lineup in case you get lost along the way...
Ashley <--------- Birthday Girl!!
Hop Prizes
Tonya (you are here)
Nikki
Julie K. 
Jessica
Jasmina
Heidi
Abby N. 
Robin
Abby H. 
Happy Hopping! :)


Wednesday, March 5, 2014

PKS Sketch Challenge

Happy Wednesday!
 
It's finally warming up here in the Frozen Tundra....Yippee!!!!   
I can FINALLY get the kids outside for some fresh air, more than just from the house to the car and back. 
 
And I've start Spring cleaning....here in Wisconsin (or at least in my neck of it), spiders are a common nuisance.  So before the thaw, I am sweeping all the ceilings and nooks/crannies to keep the pest population down to a minimum. 
 
In between the cleaning and feeding the kiddos, I created a card for the current Peachy Keen Stamps challenge.
 
It's a sketch challenge.......
 
http://www.peachykeenstamps.com/forums/topic/peachy-keen-challenge-14-03-sketch-challenge/
 
I am SO ready to Spring and all the festivities and family traditions..i.e. Spring cleaning.  


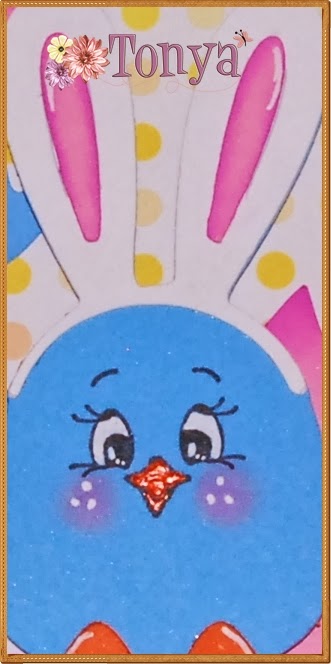
For my card, I pulled out the 3 Birds on Parade Cricut cartridge (one of my FAVS!) and cut the bunny bird at 3 1/2 inches.  I only cut the base so that I could stamp a Peachy face on him. 

 
I stamped his face in Memento Tuxedo Black ink, highlighted with a Gelly Roller, colored his beak with Pumpkin Liquid pears for dimension and interest.   Finally chalked and highlighted his cheeks.
 
The cracked egg is part of the bunny bird cut.  I stacked several on the side, in different sizes, on the left side.  I'm thinking that I should have added some yellow eggs, but hindsight is 20/20, right?